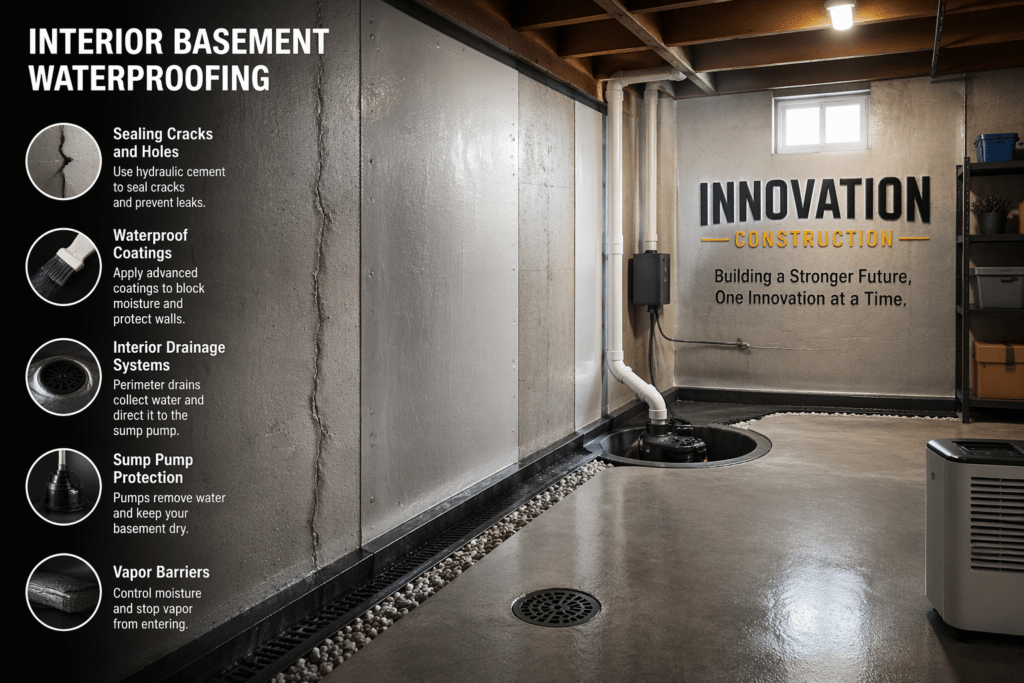
Ensuring a dry and healthy basement requires more than just ignoring occasional damp spots. Interior basement waterproofing—also called inside basement waterproofing or interior waterproofing—refers to a set of measures that control moisture and leaks from the inside out. When exterior excavation is impractical or cost‑prohibitive, these interior basement waterproofing systems offer a practical way to manage groundwater, relieve hydrostatic pressure and protect your foundation waterproofing services in NYC. This guide explores methods such as sealing cracks, applying coatings, installing drainage channels and sump pumps, and using vapor barriers. We also compare interior and exterior techniques and highlight maintenance tips to ensure your basement stays dry year‑round.
Why Basements Get Wet
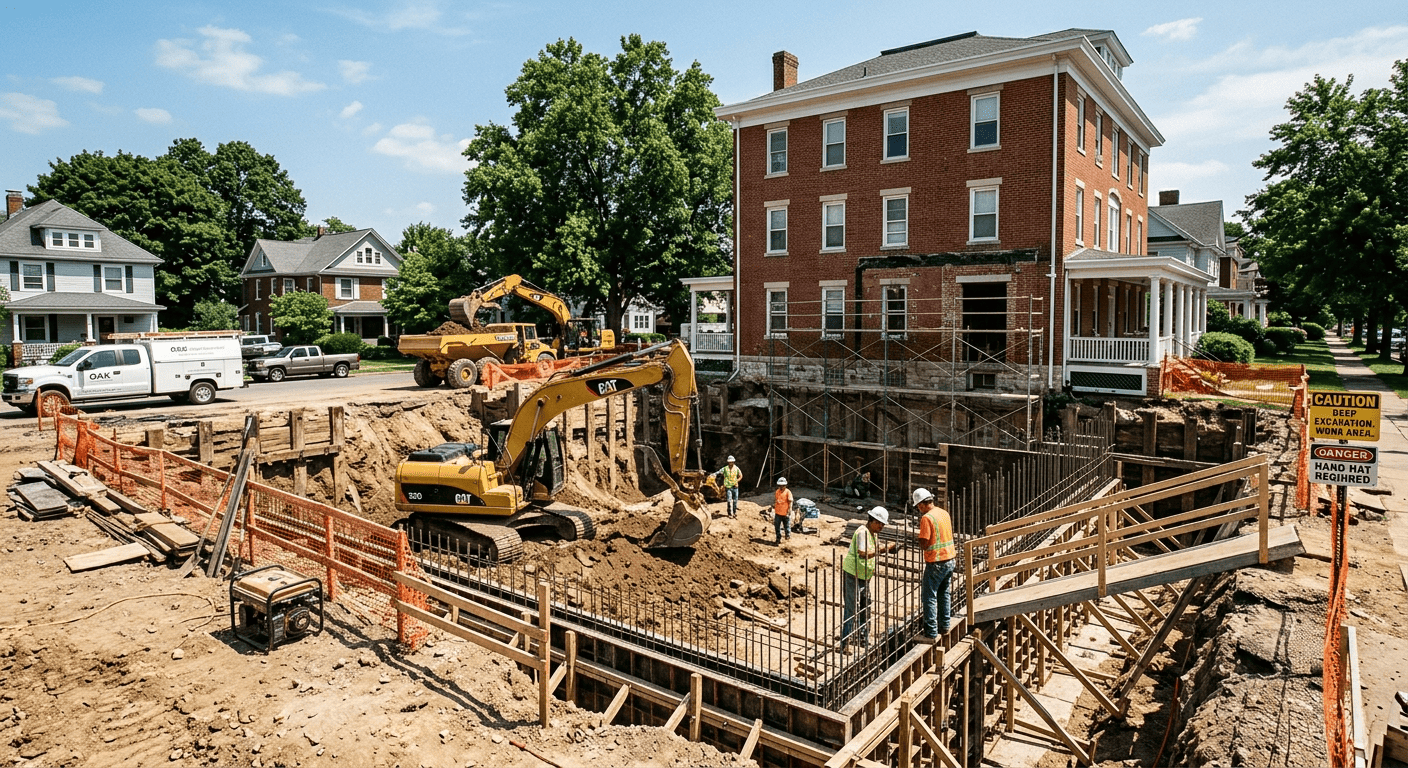
Water intrusion in basements is often due to poor exterior grading, clogged gutters, hydrostatic pressure or cracks in the foundation. The Stratum Structural Systems blog notes that soil saturated by rain can push water through foundation cracks, and faulty downspouts or plumbing leaks further add moisture. Visible puddles, damp walls, white efflorescence, musty odors and mold growth are all signs of moisture infiltration. If left unchecked, this moisture can damage your home’s structural integrity, promote mold growth and reduce property value. Interior waterproofing basement solutions help manage water after it has entered the structure and prevent further damage brick pointing and waterproofing.
Interior vs. Exterior Waterproofing
Before diving into specific techniques, it’s useful to compare interior and exterior basement waterproofing. According to Stratum, interior foundation waterproofing is generally more cost‑effective and less disruptive since it doesn’t require excavation. It can be installed quickly and is easier to maintain, making it an appealing option for homeowners with moderate water issues. However, interior methods don’t prevent water from reaching the foundation walls; they manage water after it has entered. Exterior waterproofing creates a barrier on the outside of the foundation and is more robust, but it is expensive and involves significant excavation and landscape disruption. Homeowners often choose interior solutions for minor to moderate moisture problems and budget constraints, and exterior solutions for severe water intrusion or high water tables exterior basement waterproofing.
Sealing Cracks and Holes with Hydraulic Cement
One of the first steps in water proofing for basement interiors is patching visible cracks and holes. Small openings in concrete walls or floors can allow water to seep in, especially during heavy rainfall or when the surrounding soil is saturated. For minor cracks, This Old House suggests using hydraulic cement, a fast‑setting material that expands slightly as it cures. Hydraulic cement is water‑activated and can set even under damp conditions, making it ideal for patching wet leaks. As it cures, it expands just enough to create a watertight seal without damaging surrounding materials. However, hydraulic cement doesn’t address structural movement or wider cracks, so reappearing cracks may require professional intervention.
To apply hydraulic cement:
- Prepare the surface: Use a chisel and hammer to remove loose concrete and widen the crack to about half an inch. Clean the area with a wire brush to remove dust and moisten the surface so the cement bonds properly.
- Mix small batches: Hydraulic cement sets within minutes, so prepare only what you can apply quickly. Mix to the consistency of thick paste.
- Press into cracks: Use a trowel or gloved hands to push the cement deep into the crack, smoothing it before it sets.
- Cure properly: Keep the repaired area damp for at least 24 hours to ensure proper curing.
Hydraulic cement is a straightforward way to repair cracks and is integral to interior waterproofing basement strategies. Use it in combination with other methods—such as drainage systems and coatings—to achieve comprehensive basement foundation waterproofing inside.
Applying Waterproof Coatings and Paints
Once cracks are sealed, many homeowners turn to waterproof coatings and paints for additional moisture protection. Waterproof masonry coatings create a thicker barrier than standard paint and help block moisture passing through porous concrete or masonry surfaces. These products are brushed or rolled onto clean, dry walls in multiple coats. Polyguard notes that products like KILZ Basement & Masonry Waterproofer use nanotechnology to resist water infiltration, and DRYLOK Extreme Masonry Waterproofer can withstand up to 15 psi of water pressure. Liquid rubber‑based coatings provide flexible protection that can accommodate minor structural shifts, while specialized paints with mildew inhibitors (e.g., Zinsser Watertite) reduce mold growth in high‑humidity areas.
Despite their benefits, waterproofing paints have limitations. Polyguard warns that these coatings offer only surface‑level protection and cannot address deeper structural issues. They remain on the surface and do not bridge cracks or handle significant hydrostatic pressure. For long‑term waterproofing basement walls from inside, consider combining surface coatings with interior drainage systems and sump pumps.
Interior Drainage Systems and Sump Pumps
If water continues to infiltrate despite crack repairs and coatings, interior drainage systems are the next line of defense. An interior drainage channel (often called an interior French drain or drain tile system) captures water that seeps through walls or where the wall meets the floor and directs it to a sump pump for removal. This approach eliminates the need for exterior excavation and is more affordable than exterior methods. Interior drainage is particularly effective at relieving hydrostatic pressure and preventing water accumulation under the slab.
According to United Waterproofing NJ, a typical interior drainage system involves the following components:
- Perimeter drain channel: A perforated pipe installed along the inside edge of the foundation footing collects groundwater and directs it toward a collection point.
- Sump pump: Installed in a pit at the basement’s lowest point, the sump pump collects water from the drainage channel and pumps it away from the foundation. Battery backup options ensure operation during power outages.
- Floor drains: These drains remove surface water from spills or appliance leaks and connect to the sump system.
- Footing drains: Installed beneath the basement floor, these drains relieve pressure on the foundation walls by collecting groundwater and directing it to the sump.
Interior drainage systems require proper installation by experienced contractors, as they involve cutting into the slab and placing specialized components. Once installed, they effectively manage water that enters the basement and reduce the risk of flooding.
Sump Pump Types
This Old House outlines several types of sump pumps that can complement interior drainage systems types of sump pumps:
- Pedestal pumps: The motor sits above the sump pit, making maintenance easier but causing more noise.
- Submersible pumps: The pump operates underwater in the pit, offering quieter and more powerful operation.
- Battery backup pumps: Provide protection during power outages, keeping your interior basement waterproofing systems running when you need them most.
- Water‑powered pumps: Rely on municipal water pressure instead of electricity, suitable only for homes with city water.
Selecting the right pump depends on your local conditions, water table and budget. Installing a battery backup is recommended to ensure continuous operation during storms.
Vapor Barriers and Moisture Barriers
In addition to drainage and coatings, vapor and moisture barriers help control moisture migration through basement walls. Polyguard explains that moisture barriers (Class II or III vapor retarders) install on the exterior side of walls to stop bulk water from infiltrating while allowing vapor to escape. Vapor barriers, on the other hand, are installed on the interior side to stop vapor diffusion from inside the structure. A properly selected vapor barrier can reduce moisture transfer and energy loss, protect insulation and enhance indoor comfort.
Below‑grade moisture barriers can be liquid‑applied membranes (brush, roll or spray) or sheet‑applied membranes such as self‑adhesive modified bituminous sheets. Liquid membranes are flexible and conform to irregular surfaces, whereas sheet membranes provide consistent thickness and are easy to apply in large areas. When waterproofing interior basement walls, negative‑side waterproofing membranes (applied on the inside) can help repel water, but they should be combined with drainage systems because they do not prevent water from reaching the foundation. Consult local building codes and professionals to select the appropriate barrier for your climate.
Pros and Cons of Interior Basement Waterproofing
To summarize the advantages and disadvantages of interior waterproofing basement methods, the table below highlights key points:
| Aspect | Interior Waterproofing | Exterior Waterproofing |
|---|---|---|
| Cost | Generally less expensive, with minimal excavation. | More expensive due to excavation, materials and labor. |
| Installation | Quick installation, little disruption to landscaping. | Requires extensive digging, can damage landscaping and is weather‑dependent. |
| Effectiveness | Manages water after it enters; best for minor to moderate issues. | Blocks water at the source; better for severe water intrusion or high water tables. |
| Maintenance | Easier maintenance and access to components. | Long‑lasting but harder to service once installed and may require external sump pump. |
Remember, some properties may benefit from a combination of both methods. A professional assessment can determine the best approach for your specific situation.
Additional Measures for Basement Moisture Control
Even with waterproofing interior basement walls, you should adopt additional practices to keep the space dry:
- Ensure proper grading and drainage: Sloping the soil away from your foundation and maintaining clean gutters and downspouts guides water away.
- Use dehumidifiers and ventilation: Lower humidity reduces condensation and mold growth. This Old House advises keeping relative humidity below 50 % and using exhaust fans in bathrooms or laundry areas.
- Repair plumbing leaks promptly: Fixing leaky pipes and fixtures prevents water accumulation inside the basement.
- Install leak detectors: Whole‑house water leak detectors help identify hidden leaks before they cause damage.
- Monitor and inspect regularly: Check walls and floors for new cracks, dampness or efflorescence at least annually or after heavy rain.
These maintenance steps complement your interior waterproofing efforts and reduce the likelihood of future problems.
How to Waterproof Your Basement from the Inside: Step‑By‑Step Summary
Here is a simple sequence to achieve interior basement waterproofing:
- Inspect and identify problem areas. Look for cracks, damp spots and signs of hydrostatic pressure. Determine if water enters through walls, floor joints or plumbing penetrations.
- Seal cracks and gaps. Use hydraulic cement or epoxy injections to patch hairline cracks and prevent seepage.
- Apply interior waterproofing coatings. Choose a waterproof masonry coating, liquid rubber or high‑quality waterproofing paint to create a moisture‑resistant barrier.
- Install an interior drainage system. If water problems persist, add a perimeter drainage channel, floor drains and a sump pump to direct water away.
- Consider vapor or moisture barriers. Use vapor retarders or moisture membranes to control vapor diffusion and protect insulation.
- Maintain and monitor. Keep gutters clean, ensure proper yard grading, control humidity, and inspect the basement regularly.
Following these steps helps homeowners understand how to waterproof basement from inside and ensures they choose the right combination of methods.
Conclusion: Protecting Your Home with Interior Basement Waterproofing
Basements provide valuable living space, storage and mechanical access, but they are also vulnerable to water intrusion. Interior basement waterproofing offers a cost‑effective, less invasive solution for controlling moisture and preventing damage. By sealing cracks, applying appropriate coatings, installing drainage systems and sump pumps, and using vapor barriers, you can create a comprehensive defense against water. While exterior systems may be necessary for severe conditions, interior methods often provide sufficient protection for typical basements. If you need to tackle waterproofing cellar walls, waterproofing interior basement walls, or simply want to understand how do you waterproof a basement, the strategies outlined here will help you make informed decisions and keep your home dry.